1. 系统信息
1.1 主机信息
1.2 网络信息
2. 安装虚拟机
3. 配置安装环境
3.1 创建用户、组及目录
3.2 创建环境变量
3.3 安装依赖包
3.4 修改系统版本
3.5 修改内核参数
3.6 修改用户限制
3.7 修改登录验证
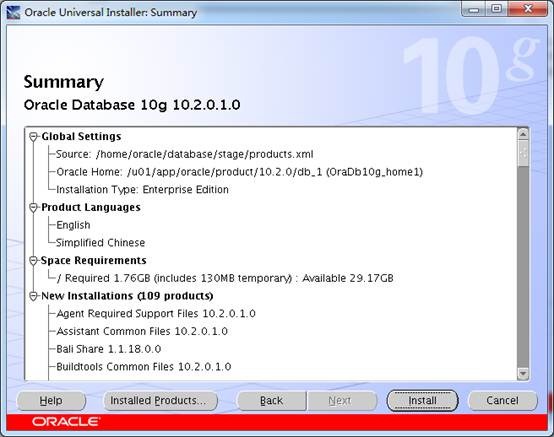
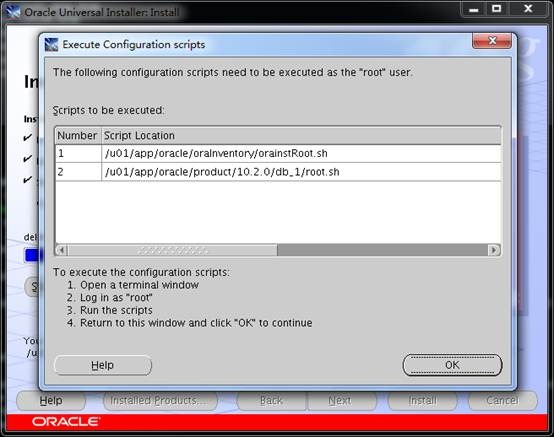
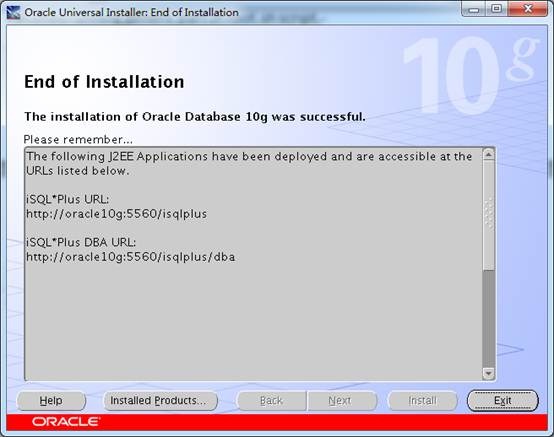
4. 安装数据库
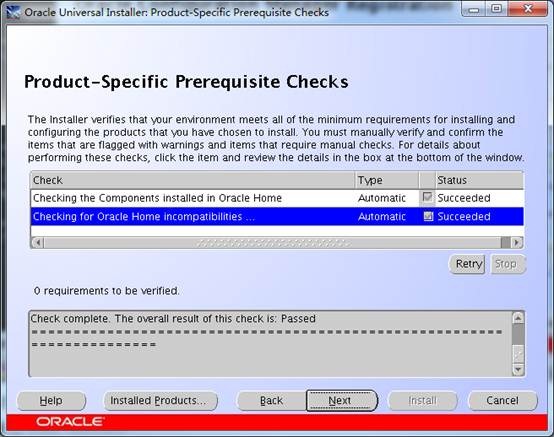
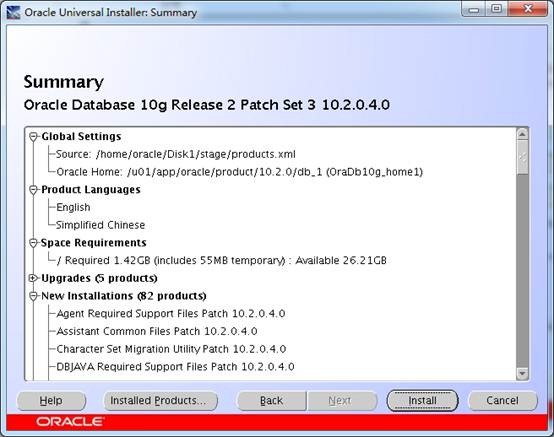
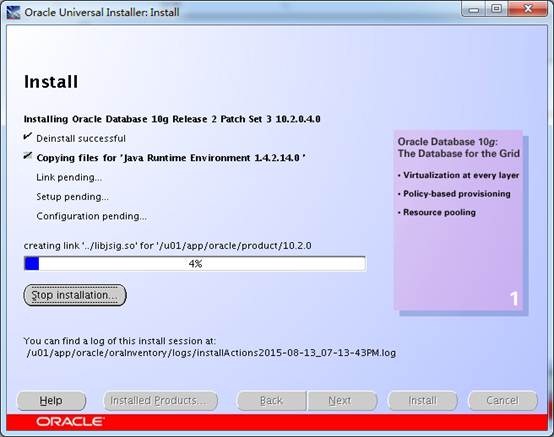
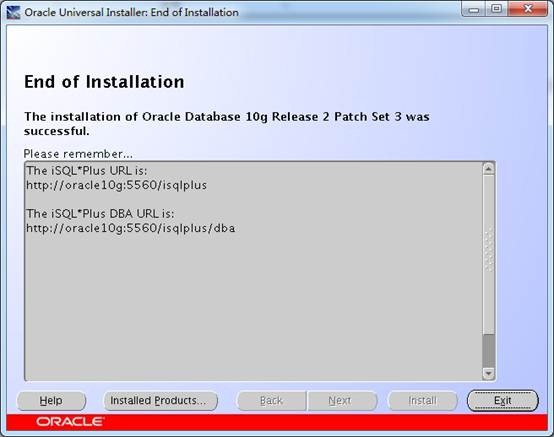
5. 升级数据库
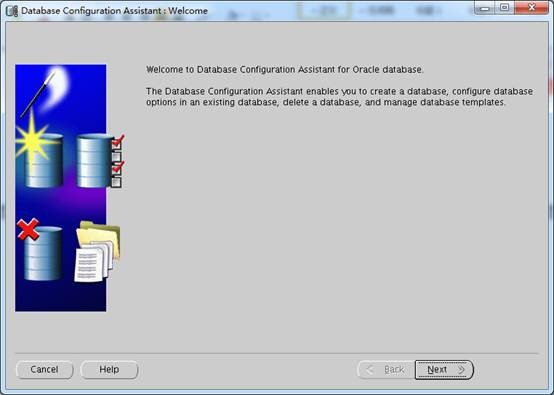
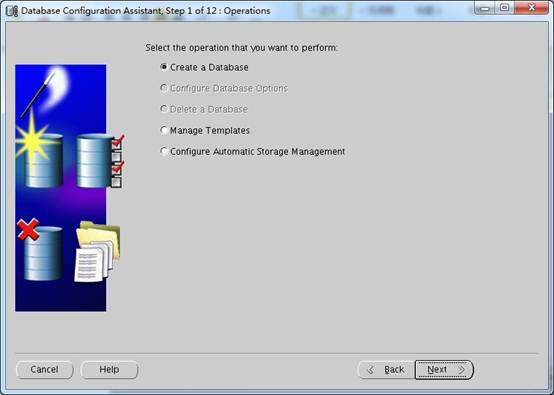
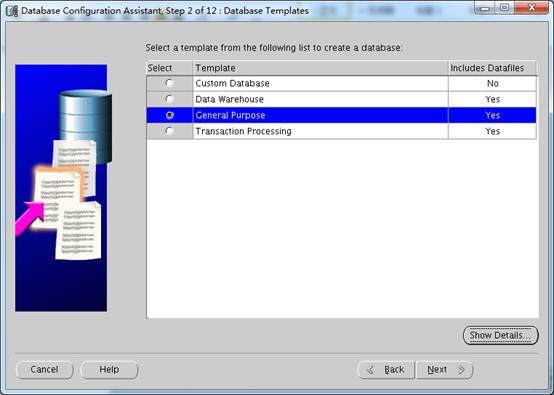
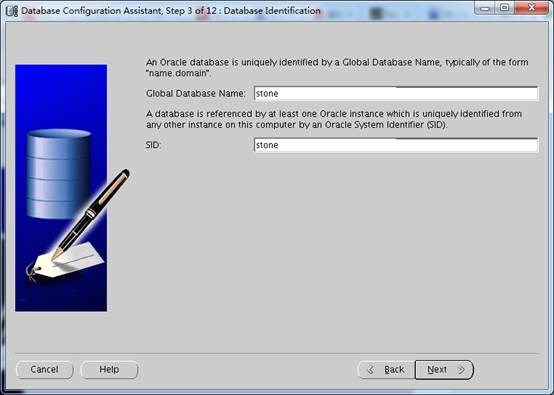
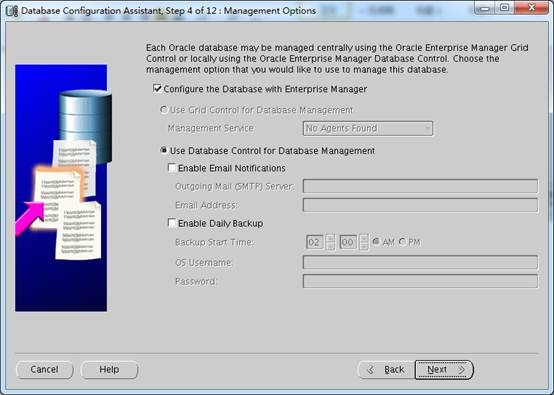
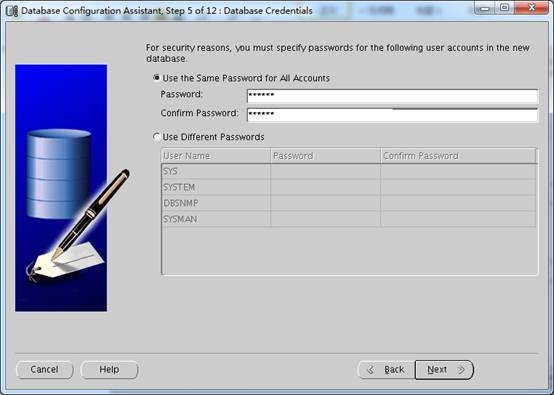
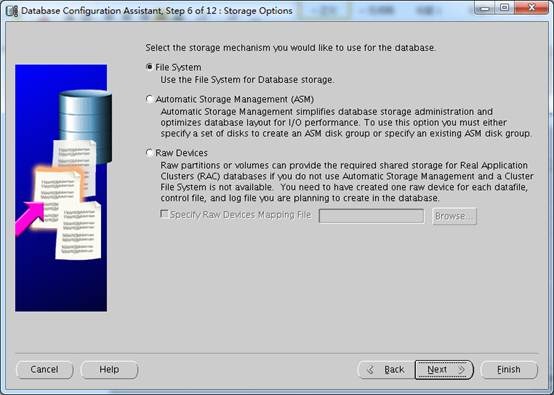
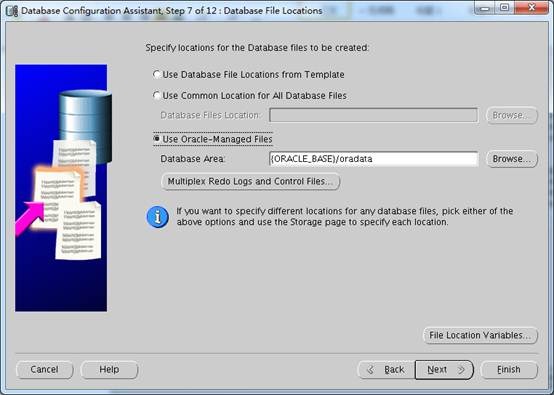
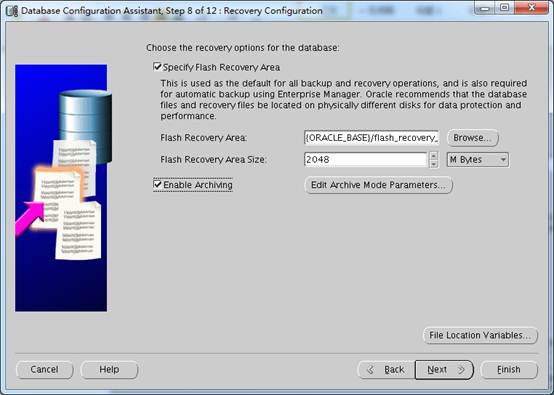
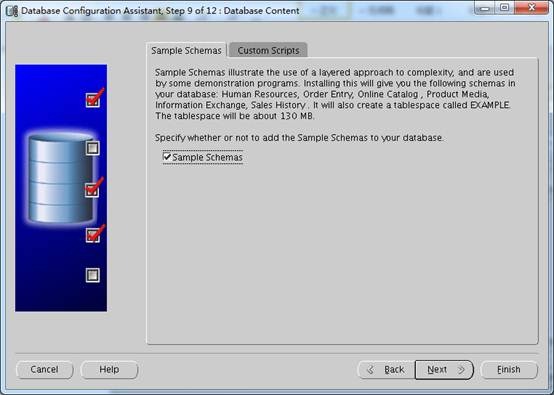
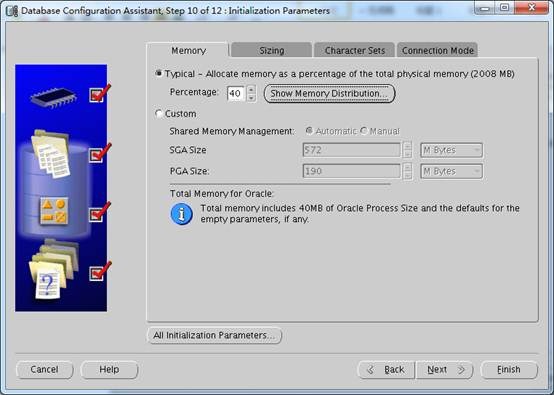
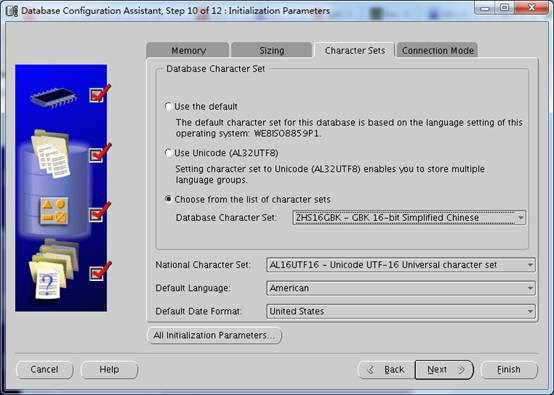
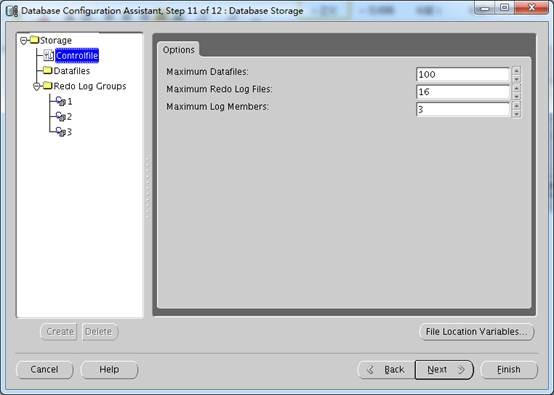
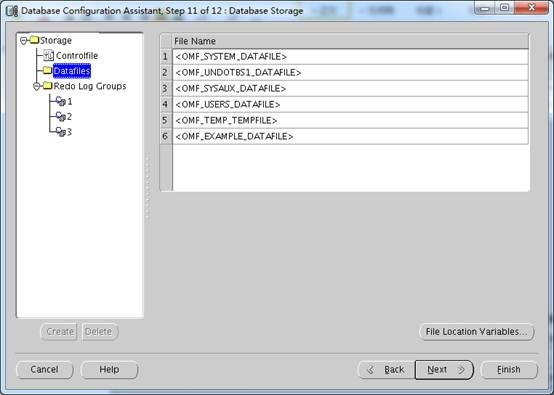
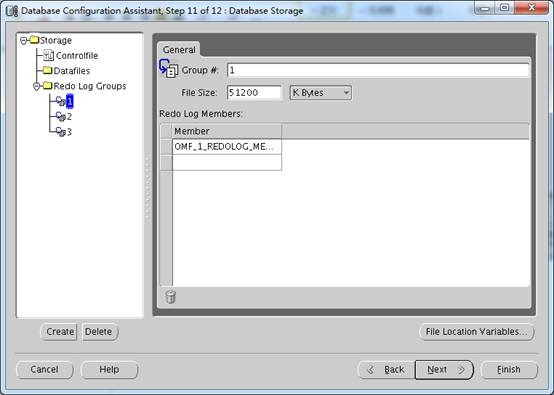
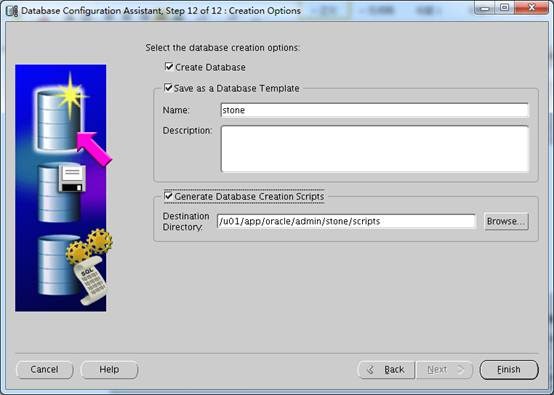
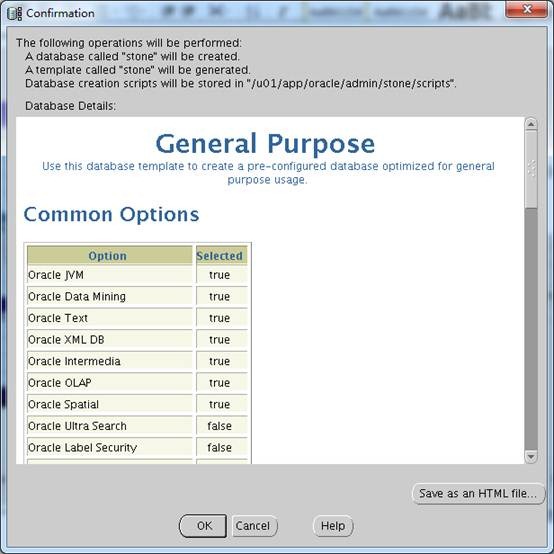
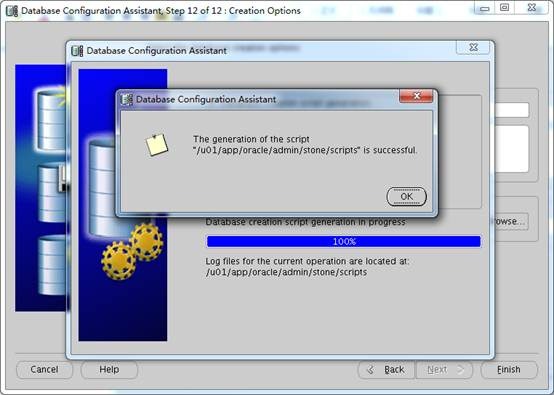
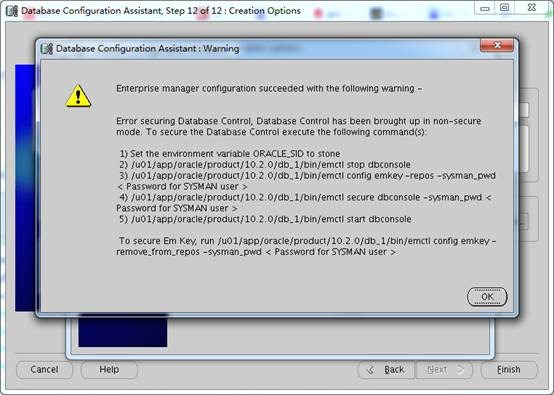
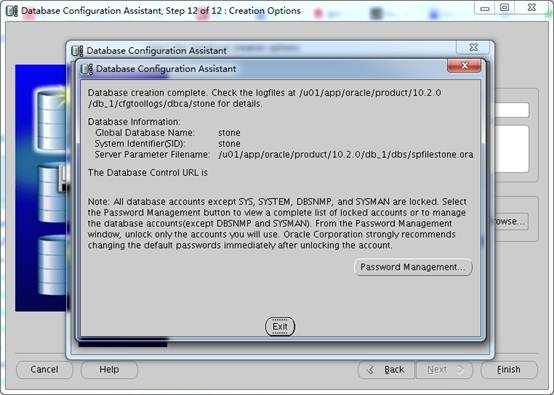
6. 创建数据库
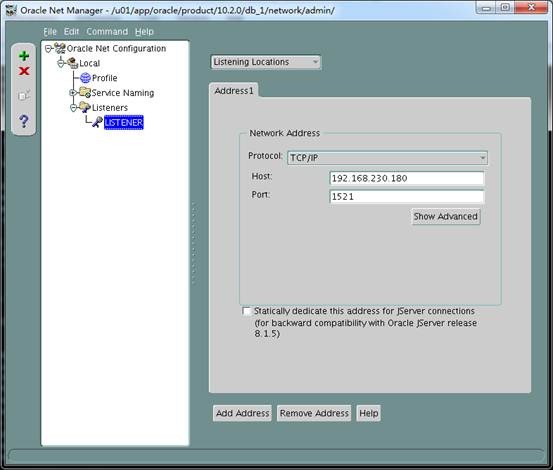
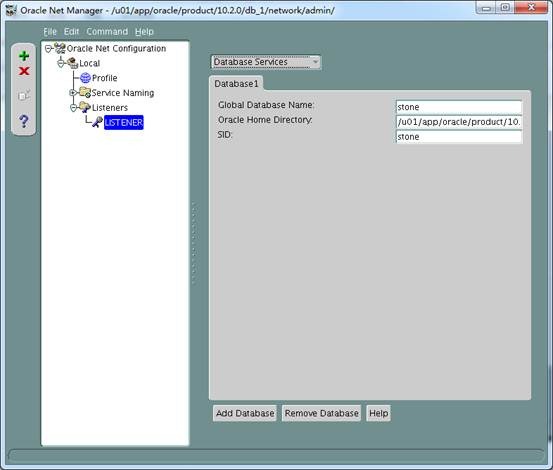
7. 配置监听
|
序号 |
操作系统 |
版本 |
内存 |
Swap |
磁盘 |
防火墙 |
SELinux |
|
1 |
RHEL |
5.5-x86_64 |
2G |
2G |
40G |
关闭 |
禁用 |
[root@oracle10g ~]# cat /etc/redhat-release
Red Hat Enterprise Linux Server release 5.5 (Tikanga)
[root@oracle10g ~]# grep MemTotal /proc/meminfo
MemTotal: 2057360 kB
[root@oracle10g ~]# grep SwapTotal /proc/meminfo
SwapTotal: 2048276 kB
[root@oracle10g ~]# df -h
Filesystem Size Used Avail Use% Mounted on
/dev/sda3 37G 2.6G 33G 8% /
/dev/sda1 99M 12M 82M 13% /boot
tmpfs 1005M 0 1005M 0% /dev/shm
.host:/ 98G 62G 37G 63% /mnt/hgfs
[root@oracle10g ~]# /etc/init.d/iptables status
Firewall is stopped.
[root@oracle10g ~]# getenforce
Disabled
|
序号 |
主机名 |
IP |
掩码 |
网关 |
|
1 |
oracle10g |
192.168.230.180 |
255.255.255.0 |
192.168.230.2 |
[root@oracle10g ~]# cat /etc/hosts
# Do not remove the following line, or various programs
# that require network functionality will fail.
127.0.0.1 localhost.localdomain localhost
::1 localhost6.localdomain6 localhost6
192.168.230.180 oracle10g
[root@oracle10g ~]# cat /etc/sysconfig/network
NETWORKING=yes
NETWORKING_IPV6=no
HOSTNAME=oracle10g
[root@oracle10g ~]# cat /etc/sysconfig/network-scripts/ifcfg-eth0
# Intel Corporation 82545EM Gigabit Ethernet Controller (Copper)
DEVICE=eth0
BOOTPROTO=none
ONBOOT=yes
HWADDR=00:0c:29:d3:a0:ef
IPADDR=192.168.230.180
NETMASK=255.255.255.0
GATEWAY=192.168.230.2
参考http://blog.itpub.net/28536251/viewspace-1455365/安装Linux系统。
创建用户、组及目录脚本,并运行脚本。
[root@oracle10g ~]# cat ora_user_dir.sh
#!/bin/bash
groupadd oinstall
groupadd dba
useradd -g oinstall -G dba oracle
echo "123456" | passwd --stdin oracle
mkdir -p /u01/oraInventory
chown -R oracle:oinstall /u01/
chmod -R 775 /u01/
[root@oracle10g ~]# sh ora_user_dir.sh
Changing password for user oracle.
passwd: all authentication tokens updated successfully.
创建环境变量列表文件,并增加环境变量到配置文件。
[root@oracle10g ~]# cat ora_env.txt
ORACLE_BASE=/u01/app/oracle; export ORACLE_BASE
ORACLE_HOME=$ORACLE_BASE/product/10.2.0/db_1; export ORACLE_HOME
LD_LIBRARY_PATH=$ORACLE_HOME/lib; export LD_LIBRARY_PATH
ORACLE_SID=stone; export ORACLE_SID
PATH=$ORACLE_HOME/bin:$PATH; export PATH
if [ $USER = "oracle" ]; then
if [ $SHELL = "/bin/ksh" ]; then
ulimit -p 16384
ulimit -n 65536
else
ulimit -u 16384 -n 65536
fi
fi
[root@oracle10g ~]# cat ora_env.txt >> /home/oracle/.bash_profile
创建依赖包列表文件,并安装依赖包
[root@oracle10g ~]# cat ora_software1.txt
binutils*
compat-libstdc++*
elfutils-libelf*
elfutils-libelf-devel*
elfutils-libelf-devel-static*
gcc*
gcc-c++*
glibc*
glibc-common*
glibc-devel*
glibc-headers*
kernel-headers*
ksh*
libaio*
libaio*
libgcc*
libgomp*
libstdc++*
libstdc++-devel*
libXp*
libXt*
make*
sysstat*
unixODBC*
unixODBC-devel*
[root@oracle10g ~]# cat ora_software1.txt | xargs yum install –y
因为Oracle 10g官方只支持到RHEL4为止,所以需要更改版本说明,编辑/etc/redhat-release文件,删除Red Hat Enterprise Linux Server release 5 (Tikanga),增加redhat-4。
[root@oracle10g ~]# cat /etc/redhat-release
redhat-4
创建内存参数列表文件,将内容增加到/etc/sysctl.conf文件中。
[root@oracle10g ~]# cat sysctl.txt
kernel.shmmni = 4096
kernel.sem = 250 32000 100 128
fs.file-max = 65536
net.ipv4.ip_local_port_range = 1024 65000
net.core.rmem_default = 262144
net.core.rmem_max = 262144
net.core.wmem_default = 262144
net.core.wmem_max = 262144
[root@oracle10g ~]# cat sysctl.txt >> /etc/sysctl.conf
[root@oracle10g ~]# sysctl -p
net.ipv4.ip_forward = 0
net.ipv4.conf.default.rp_filter = 1
net.ipv4.conf.default.accept_source_route = 0
kernel.sysrq = 0
kernel.core_uses_pid = 1
net.ipv4.tcp_syncookies = 1
kernel.msgmnb = 65536
kernel.msgmax = 65536
kernel.shmmax = 68719476736
kernel.shmall = 4294967296
kernel.shmmni = 4096
kernel.sem = 250 32000 100 128
fs.file-max = 65536
net.ipv4.ip_local_port_range = 1024 65000
net.core.rmem_default = 262144
net.core.rmem_max = 262144
net.core.wmem_default = 262144
net.core.wmem_max = 262144
[root@oracle10g ~]# id oracle
uid=500(oracle) gid=500(oinstall) groups=500(oinstall),501(dba)
[root@oracle10g ~]# echo "501" >/proc/sys/vm/hugetlb_shm_group
[root@oracle10g ~]# cat /proc/sys/vm/hugetlb_shm_group
501
创建用户列表文件,将内容增加到/etc/security/limits.conf文件中。
[root@oracle10g ~]# cat oraclelimit.txt
oracle soft nproc 2047
oracle hard nproc 16384
oracle soft nofile 1024
oracle hard nofile 65536
[root@oracle10g ~]# cat oraclelimit.txt >> /etc/security/limits.conf
[root@oracle10g ~]# tail -4 /etc/security/limits.conf
oracle soft nproc 2047
oracle hard nproc 16384
oracle soft nofile 1024
oracle hard nofile 65536
更改/etc/pam.d/login文件,添加下面的内容,使用户限制生效。
[root@oracle10g ~]# tail -1 /etc/pam.d/login
session required pam_limits.so
[root@oracle10g ~]# su - oracle
[oracle@oracle10g ~]$ cpio -idmv < /mnt/hgfs/data/oracle/software/10204/10201_database_linux_x86_64.cpio
[oracle@oracle10g ~]$ ls
database
[oracle@oracle10g ~]$ cd database/
[oracle@oracle10g database]$ ls
doc install response runInstaller stage welcome.html
[oracle@oracle10g database]$ export DISPLAY=192.168.230.1:0.0
[oracle@oracle10g database]$ ./runInstaller
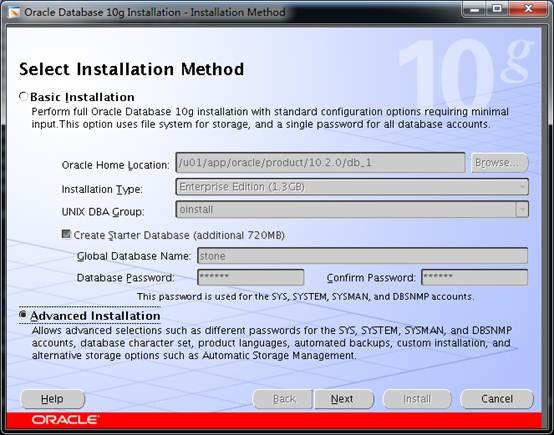
选择高级模式。
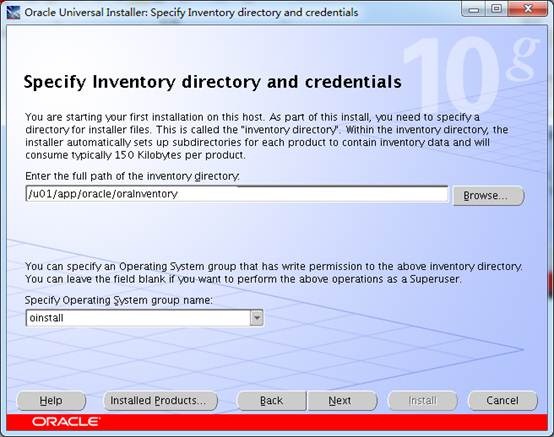
指定库存目录和安装组。
选择企业版。
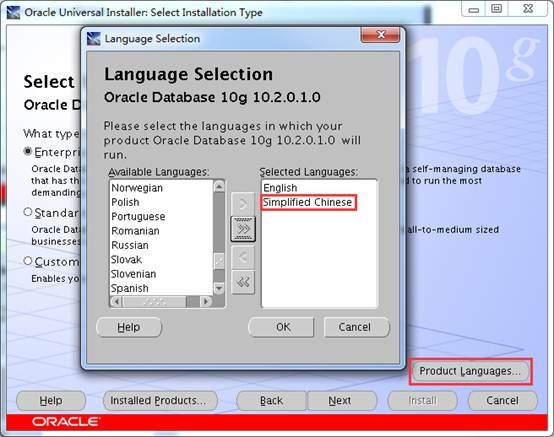
增加简体中文语言。
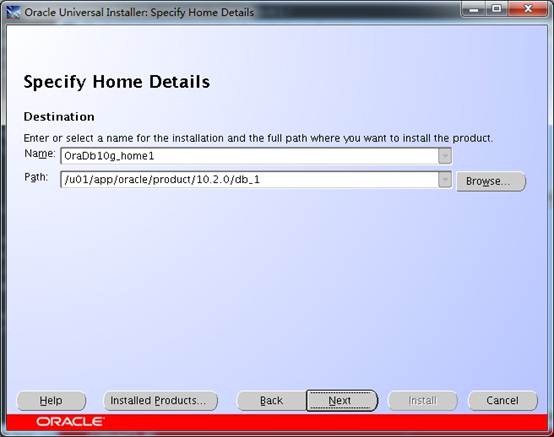
指定安装目录。
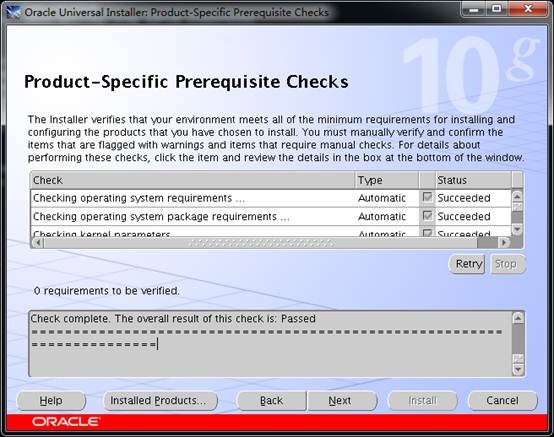
安装环境检查。
如果提示swap不够,可以使用以下方式增加swap。
[root@oracle10g ~]# dd if=/dev/zero of=/tmp/swap bs=1M count=2000
2000+0 records in
2000+0 records out
2097152000 bytes (2.1 GB) copied, 52.036 seconds, 40.3 MB/s
[root@oracle10g ~]# ll -h /tmp/swap
-rw-r--r-- 1 root root 2.0G Aug 13 18:28 /tmp/swap
[root@oracle10g ~]# mkswap /tmp/swap
Setting up swapspace version 1, size = 2097147 kB
[root@oracle10g ~]# swapon -s
Filename Type Size Used Priority
/dev/sda2 partition 2048276 12 -1
[root@oracle10g ~]# swapon /tmp/swap
[root@oracle10g ~]# swapon -s
Filename Type Size Used Priority
/dev/sda2 partition 2048276 12 -1
/tmp/swap file 2047992 0 -2
[root@oracle10g ~]#/u01/app/oracle/oraInventory/orainstRoot.sh
Changing permissions of /u01/app/oracle/oraInventory to 770.
Changing groupname of /u01/app/oracle/oraInventory to oinstall.
The execution of the script is complete
[root@oracle10g ~]# /u01/app/oracle/product/10.2.0/db_1/root.sh
Running Oracle10 root.sh script...
The following environment variables are set as:
ORACLE_OWNER= oracle
ORACLE_HOME= /u01/app/oracle/product/10.2.0/db_1
Enter the full pathname of the local bin directory: [/usr/local/bin]:
Copying dbhome to /usr/local/bin ...
Copying oraenv to /usr/local/bin ...
Copying coraenv to /usr/local/bin ...
Creating /etc/oratab file...
Entries will be added to the /etc/oratab file as needed by
Database Configuration Assistant when a database is created
Finished running generic part of root.sh script.
Now product-specific root actions will be performed.
[root@oracle10g ~]# yum install java-1.6.0-openjdk*
[root@oracle10g ~]# su - oracle
[oracle@oracle10g ~]$ jar xvf /mnt/hgfs/data/oracle/software/10204/p6810189_10204_Linux-x86-64.zip
[oracle@oracle10g ~]$ ls
database Disk1 README.html
[oracle@oracle10g ~]$ cd Disk1/
[oracle@oracle10g Disk1]$ ls
10204_buglist.htm install patch_note.htm response runInstaller stage
[oracle@oracle10g Disk1]$ export DISPLAY=192.168.230.1:0.0
[oracle@oracle10g Disk1]$ chmod 755 runInstaller
[oracle@oracle10g Disk1]$ chmod 755 /home/oracle/Disk1/install/.oui
[oracle@oracle10g Disk1]$ chmod 755 /home/oracle/Disk1/install/unzip
[oracle@oracle10g Disk1]$ ./runInstaller –ignoresysprereqs
需要加上–ignoresysprereqs参数,不然会报版本不对的错误。
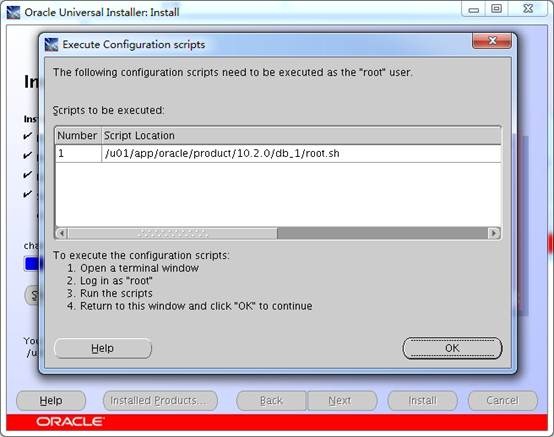
[root@oracle10g ~]# /u01/app/oracle/product/10.2.0/db_1/root.sh
Running Oracle10 root.sh script...
The following environment variables are set as:
ORACLE_OWNER= oracle
ORACLE_HOME= /u01/app/oracle/product/10.2.0/db_1
Enter the full pathname of the local bin directory: [/usr/local/bin]:
The file "dbhome" already exists in /usr/local/bin. Overwrite it? (y/n)
[n]: y
Copying dbhome to /usr/local/bin ...
The file "oraenv" already exists in /usr/local/bin. Overwrite it? (y/n)
[n]: y
Copying oraenv to /usr/local/bin ...
The file "coraenv" already exists in /usr/local/bin. Overwrite it? (y/n)
[n]: y
Copying coraenv to /usr/local/bin ...
Entries will be added to the /etc/oratab file as needed by
Database Configuration Assistant when a database is created
Finished running generic part of root.sh script.
Now product-specific root actions will be performed.
[oracle@oracle10g ~]$ dbca
[oracle@oracle10g ~]$ sqlplus / as sysdba
SQL*Plus: Release 10.2.0.4.0 - Production on Thu Aug 13 19:38:59 2015
Copyright (c) 1982, 2007, Oracle. All Rights Reserved.
Connected to:
Oracle Database 10g Enterprise Edition Release 10.2.0.4.0 - 64bit Production
With the Partitioning, OLAP, Data Mining and Real Application Testing options
[root@oracle10g ~]# su - oracle
[oracle@oracle10g ~]$ export DISPLAY=192.168.230.1:0.0
[oracle@oracle10g ~]$ netmgr
[oracle@oracle10g ~]$ lsnrctl start
LSNRCTL for Linux: Version 10.2.0.4.0 - Production on 14-AUG-2015 09:09:58
Copyright (c) 1991, 2007, Oracle. All rights reserved.
Starting /u01/app/oracle/product/10.2.0/db_1/bin/tnslsnr: please wait...
TNSLSNR for Linux: Version 10.2.0.4.0 - Production
System parameter file is /u01/app/oracle/product/10.2.0/db_1/network/admin/listener.ora
Log messages written to /u01/app/oracle/product/10.2.0/db_1/network/log/listener.log
Listening on: (DESCRIPTION=(ADDRESS=(PROTOCOL=tcp)(HOST=192.168.230.180)(PORT=1521)))
Connecting to (DESCRIPTION=(ADDRESS=(PROTOCOL=TCP)(HOST=192.168.230.180)(PORT=1521)))
STATUS of the LISTENER
------------------------
Alias LISTENER
Version TNSLSNR for Linux: Version 10.2.0.4.0 - Production
Start Date 14-AUG-2015 09:09:58
Uptime 0 days 0 hr. 0 min. 0 sec
Trace Level off
Security ON: Local OS Authentication
SNMP OFF
Listener Parameter File /u01/app/oracle/product/10.2.0/db_1/network/admin/listener.ora
Listener Log File /u01/app/oracle/product/10.2.0/db_1/network/log/listener.log
Listening Endpoints Summary...
(DESCRIPTION=(ADDRESS=(PROTOCOL=tcp)(HOST=192.168.230.180)(PORT=1521)))
Services Summary...
Service "stone" has 1 instance(s).
Instance "stone", status UNKNOWN, has 1 handler(s) for this service...
The command completed successfully
