1. 环境准备
1.1 Java环境
1.2 Maven
1.3 IDEA
1.4 Docker环境
1.5 Mysql8.0.28
https://mp.weixin.qq.com/s/5PC_VXtNc8689ag8b8cYLA
1.6 其它环境准备
还需要如下的如下环境:
https://mp.weixin.qq.com/s/qHHcbl6AMmdEbZLKnhz_tA
https://mp.weixin.qq.com/s/BaXK0dMu4whOrnKQbb6G-A
Windows10之wsl-Linux子系统安装JDK、Maven环境
https://mp.weixin.qq.com/s/Lq30469wZgikM72s8tv1ZA
在阅读本文需要对Apache SeaTunne有一点了解
https://mp.weixin.qq.com/s/uHZ-29OF-NawOL4oZW6z2A
2. 源码包下载
https://seatunnel.apache.org/download
https://github.com/apache/seatunnel
https://github.com/apache/seatunnel-web
3. idea项目配置
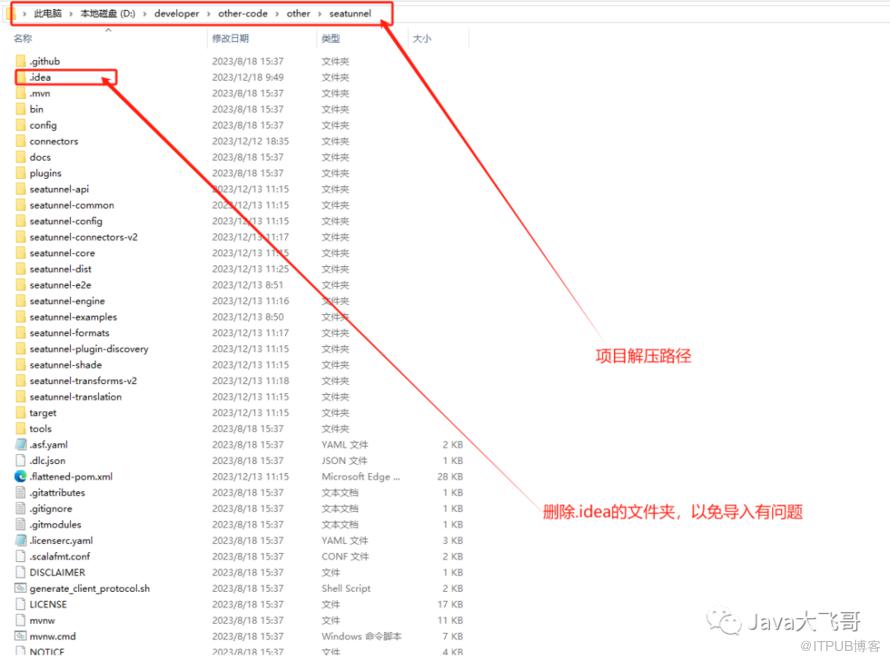
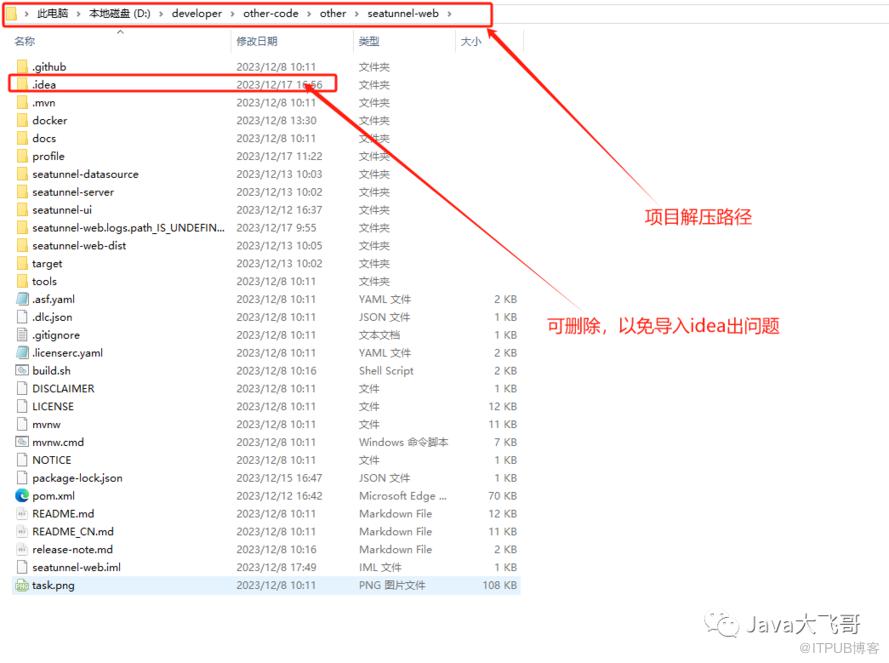
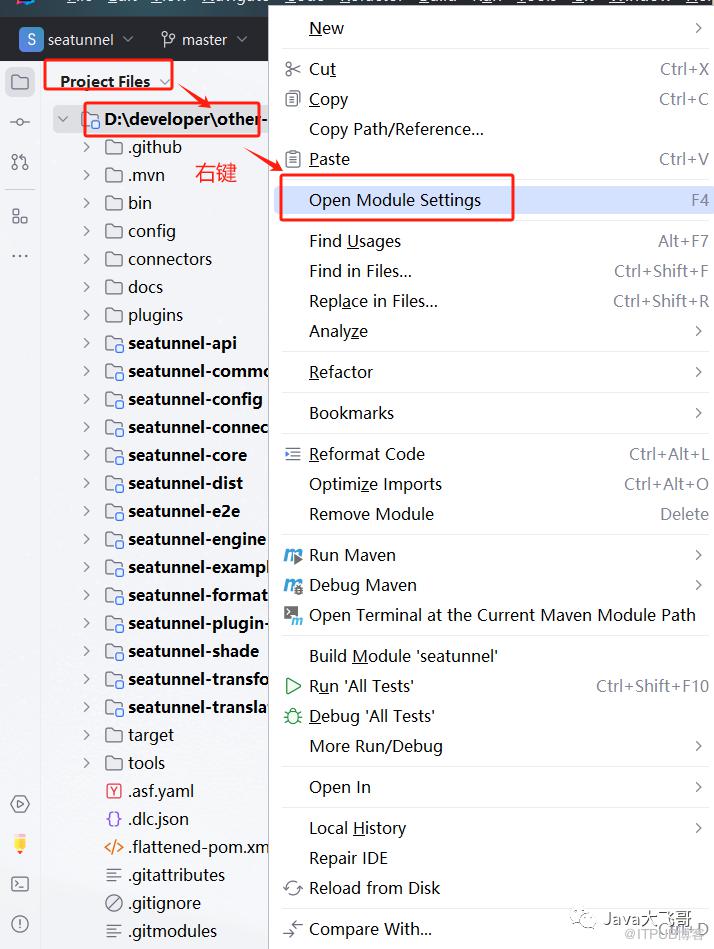
3.1 项目导入
seatunnel解压路径如下:
git clone https://github.com/apache/seatunnel-web.gitgit checkout 1.0.0-release或者使用git拉取,git环境可要可不要
3.2 maven配置
 <localRepository>D:\developer\repositorylocalRepository>
<mirrors>
    <mirror>
      <id>aliyunmavenid>
      <mirrorOf>*mirrorOf>
      <name>阿里云公共仓库name>
      <url>https://maven.aliyun.com/repository/publicurl>
    mirror>
    <mirror>
      <id>aliyunmaven2id>
      <mirrorOf>*mirrorOf>
      <name>阿里云公共仓库2name>
      <url>https://maven.aliyun.com/repository/apache-snapshotsurl>
    mirror>
    <mirror>
      <id>aliyunmaven3id>
      <mirrorOf>*mirrorOf>
      <name>阿里云公共仓库3name>
      <url>https://maven.aliyun.com/repository/centralurl>
    mirror>
  mirrors>

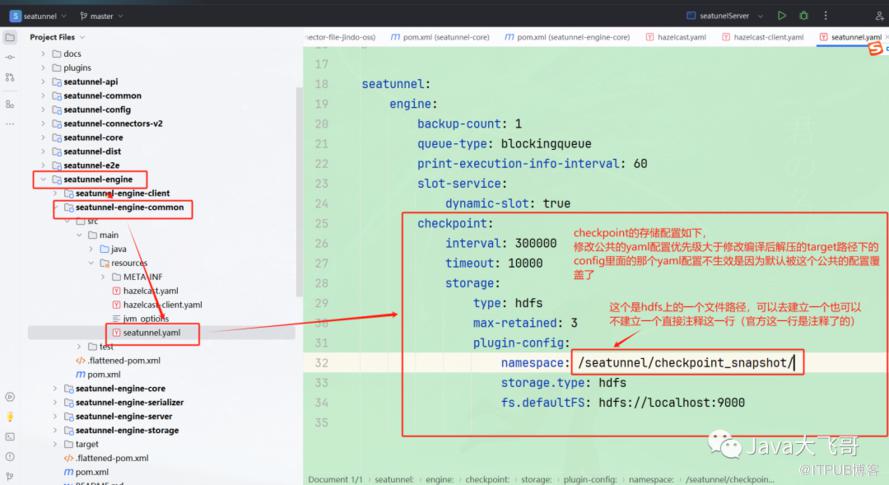
3.3 项目JDK配置

3.4 项目启动参数配置
3.4.1 seatunnel项目启动参数配置
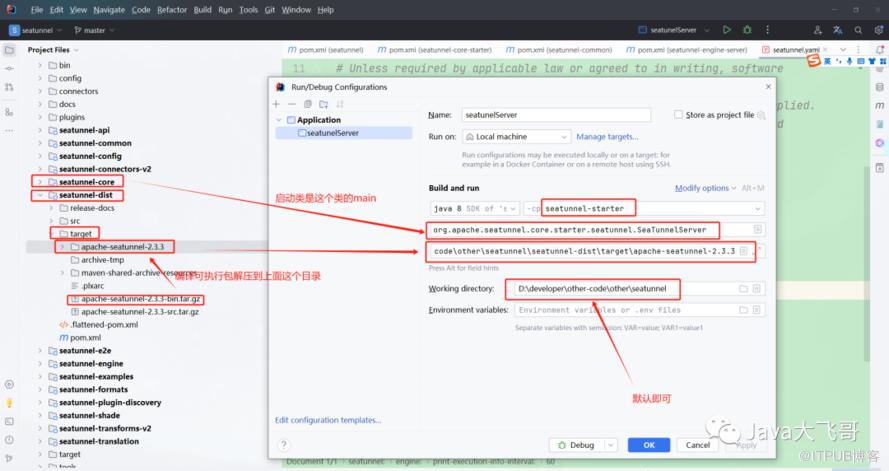
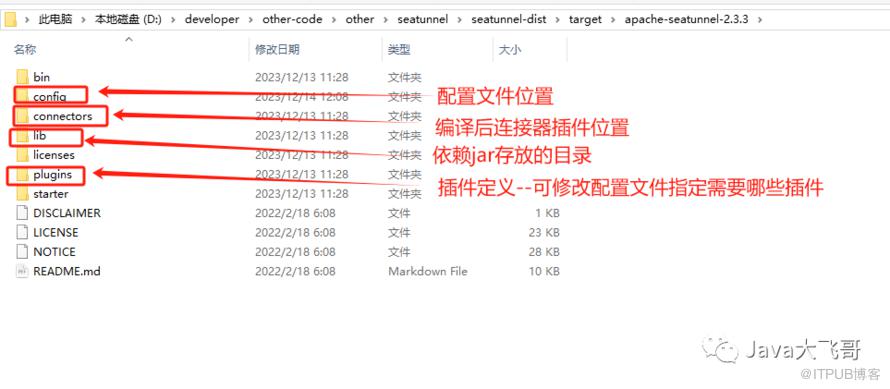
-DSEATUNNEL_HOME=D:\developer\other-code\other\seatunnel\seatunnel-dist\target\apache-seatunnel-2.3.3
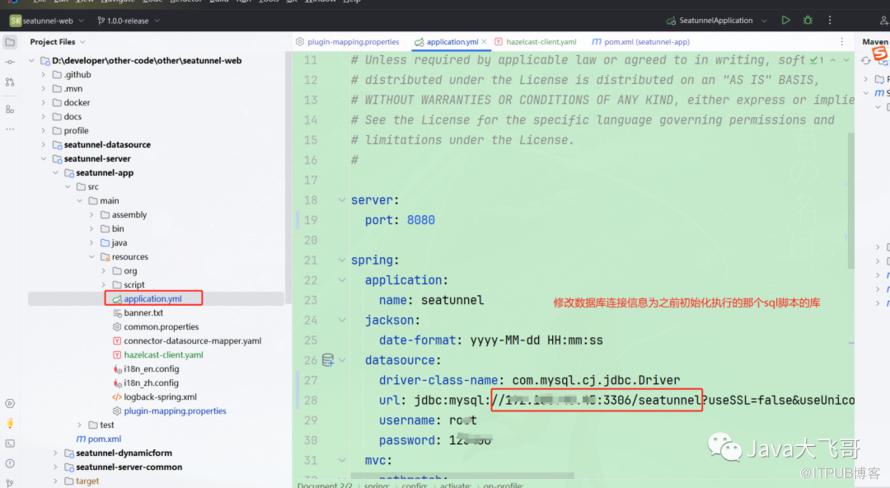
3.4.2 seatunnel-web项目启动参数配置


jvm参数
-DSEATUNNEL_HOME=D:\developer\other-code\other\seatunnel\seatunnel-dist\target\apache-sea
环境变量
ST_WEB_BASEDIR_PATH=D:\developer\other-code\other\seatunnel-web\seatunnel-web-dist\target\apache-seatunnel-web-1.0.1-SNAPSHOT\apache-seatunnel-web-1.0.1-SNAPSHOT
4. 源码编译运行
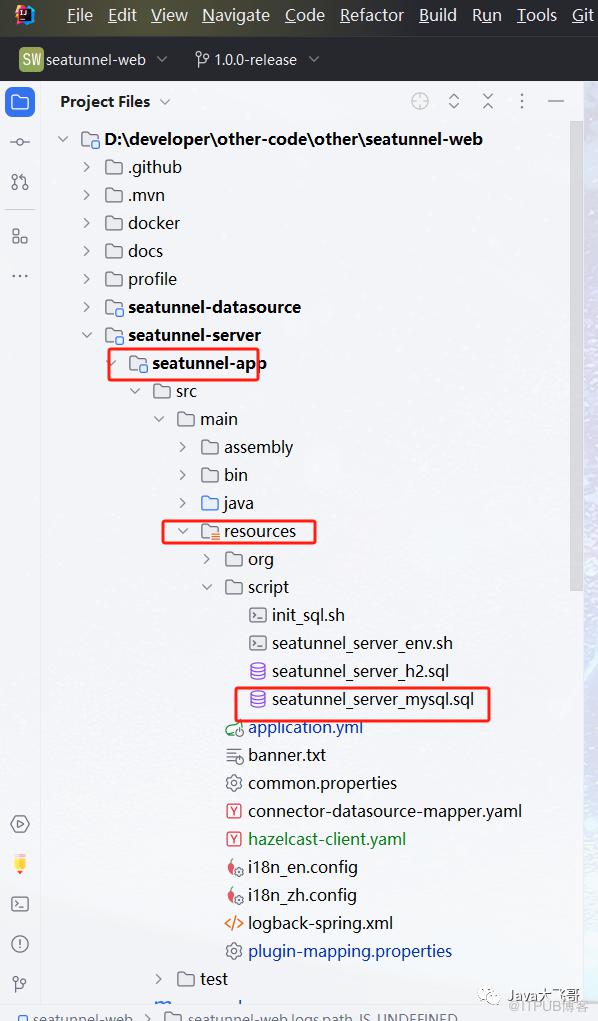
4.1 sql脚本执行
脚本如下,复制出来执行即可:

4.2 编译构建
4.2.1 seatunnel编译构建
       <dependency>
            <groupId>com.aliyun.jindodatagroupId>
            <artifactId>jindo-coreartifactId>
            <version>${jindo-sdk.version}version>
            <scope>systemscope>
            <systemPath>${project.basedir}/src/main/resources/lib/jindo-core-4.6.1.jarsystemPath>
        dependency>

        <dependency>
            <groupId>com.aliyun.jindodatagroupId>
            <artifactId>jindosdkartifactId>
            <version>${jindo-sdk.version}version>
            <scope>systemscope>
            <systemPath>${project.basedir}/src/main/resources/lib/jindo-sdk-4.6.1.jarsystemPath>
        dependency>

        <build>
        <plugins>
            <plugin>
                <groupId>org.springframework.bootgroupId>
                <artifactId>spring-boot-maven-pluginartifactId>
                <version>2.4.2version>
                <configuration>
                    <includeSystemScope>trueincludeSystemScope>
                configuration>
            plugin>
        plugins>
    build>


              <plugin>
                <groupId>org.apache.maven.pluginsgroupId>
                <artifactId>maven-gpg-pluginartifactId>
                <version>3.0.1version>
                <executions>
                    <execution>
                        <id>sign-artifactsid>
                        <phase>verifyphase>
                        <goals>
                            <goal>signgoal>
                        goals>
                    execution>
                executions>
                <configuration>
                    <skip>trueskip>
                configuration>
            plugin>
4.2.3 seatunnel-web编译构建
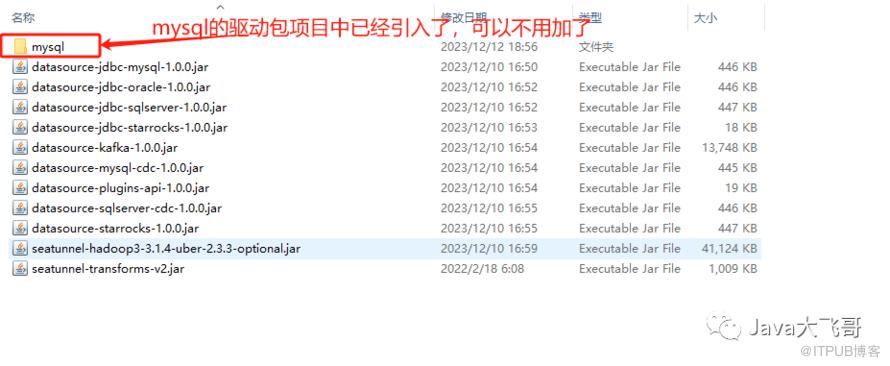
         <dependency>
            <groupId>mysqlgroupId>
            <artifactId>mysql-connector-javaartifactId>
            <version>8.0.33version>
        dependency>
seatunnel.source.Jdbc = connector-jdbc
seatunnel.sink.Jdbc = connector-jdbc
4.3 编译打包命令
seatunnel项目运行这个:
mvn clean package -pl seatunnel-dist -am -Dmaven.test.skip=true
seatunnel打包插件命令实例如下:
mvn clean package -pl seatunnel-connectors-v2/connector-jdbc -am -DskipTests -T 1C

seatunnel-web项目运行这个:
mvn clean package -pl seatunnel-web-dist -am -Dmaven.test.skip=true
或者可以直接点击右侧maven的package打包即可
https://seatunnel.apache.org/docs/2.3.3/contribution/setup
https://github.com/apache/seatunnel-web
4.4 启动运行

npm install
npm run dev
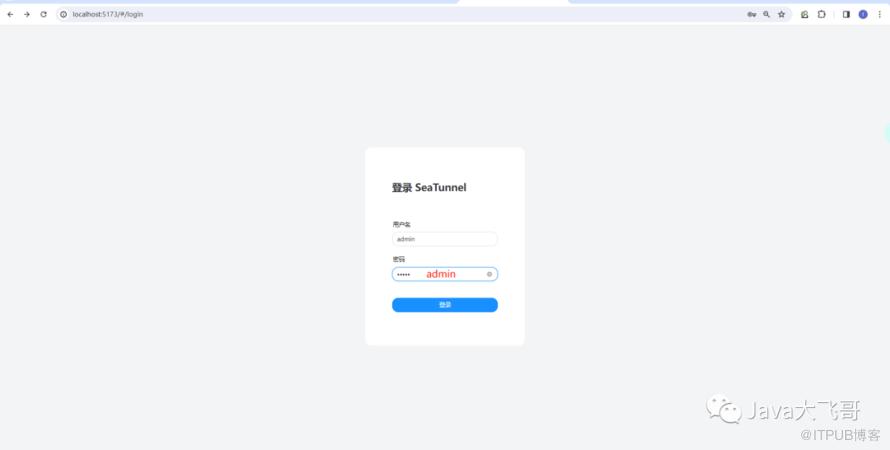
4.5 访问首页
http://localhost:5173/
用户名/密码都是admin
5. mysql-jdbc 到mysql-jdbc的单表数据同步
5.1 添加数据源

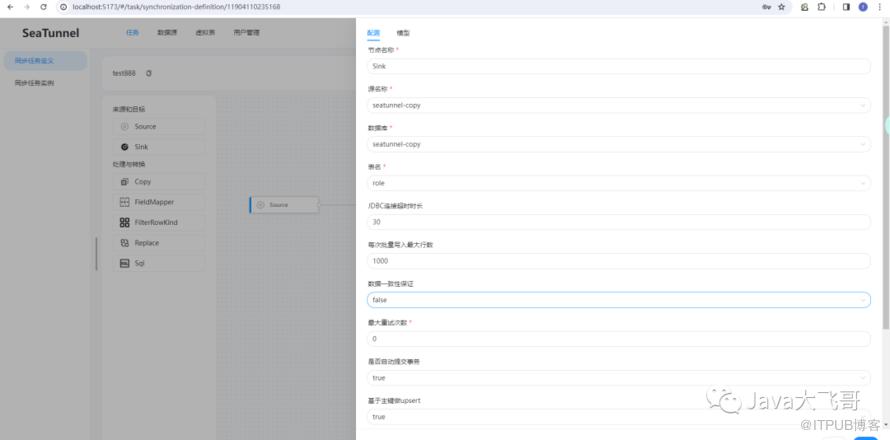
5.2 同步任务定义

5.3 同步任务执行


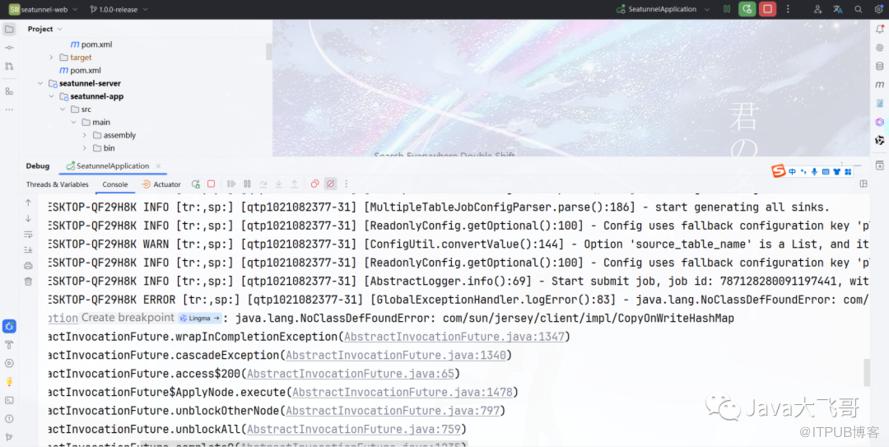
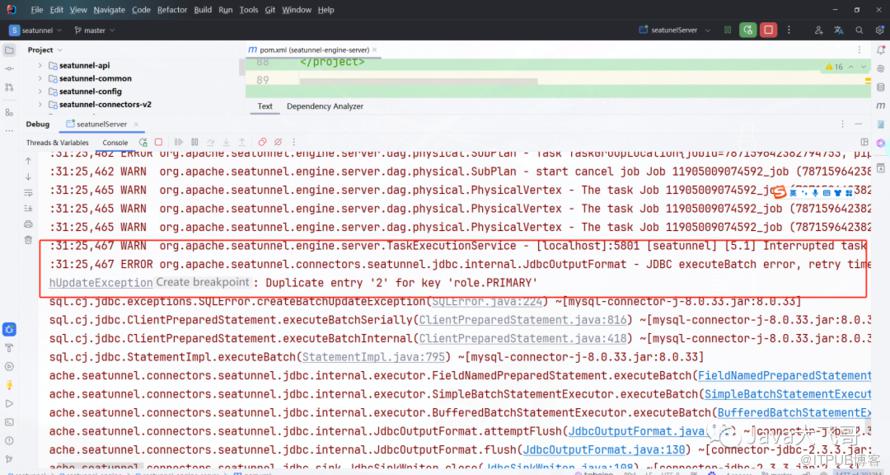
5.4 同步任务执行遇到的问题


5.5 同步任务执行的结果

6. 总结
7.资料分享
链接:https://pan.baidu.com/s/1DWKpX2j5nyvDT3UucVc1Sg提取码:ip7p